Installing Software at Your New Domain
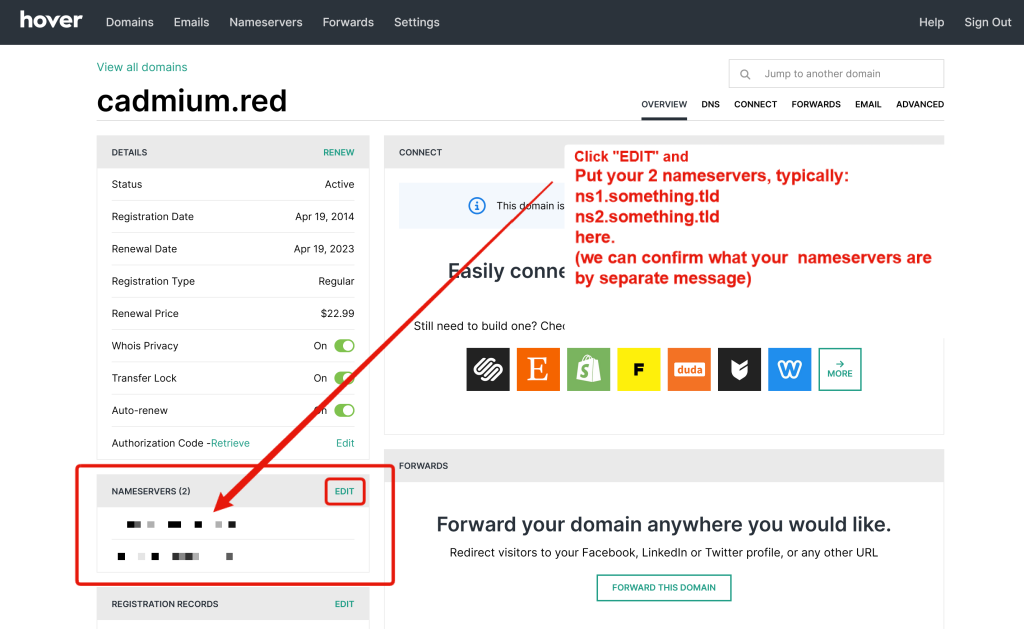
Hover
Nameservers
Congratulations on your exciting new Domain Name! Here’s how you get the software of your choice installed there!
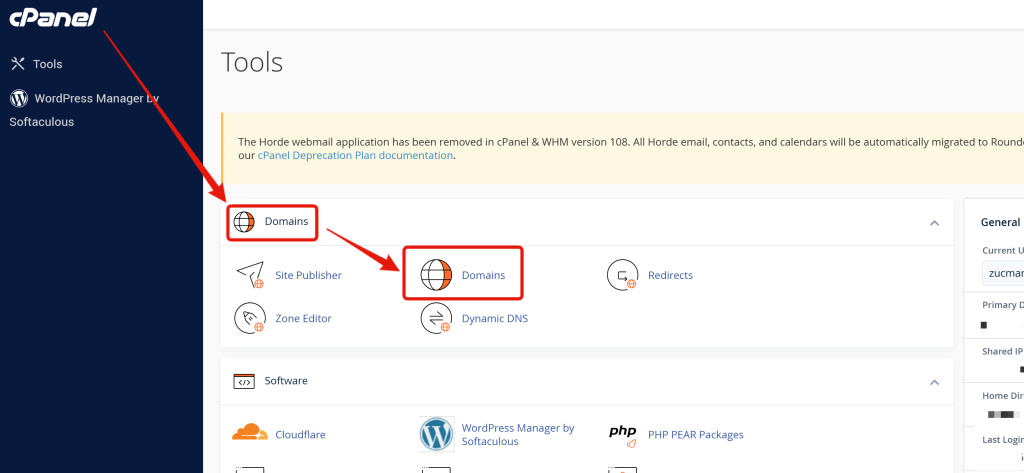
cPanel (not Fast Comet Portal)
Domains
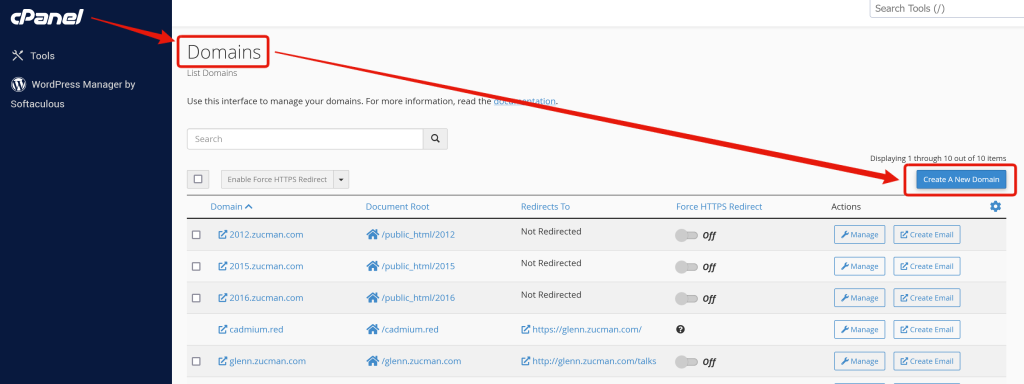
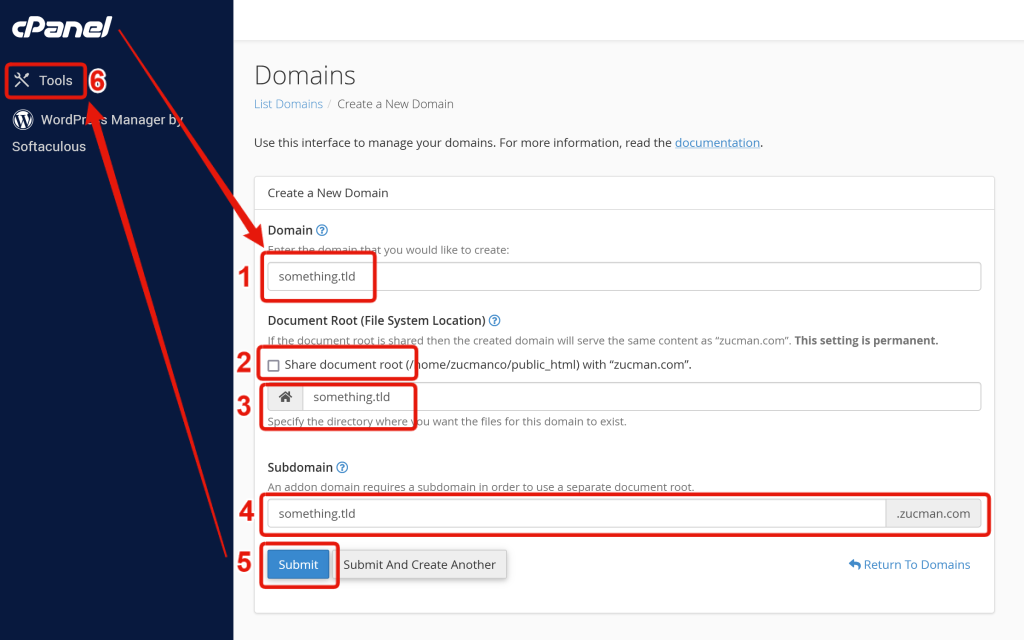
- Enter the new domain name you bought at your Domain Registrar
- UNcheck “share document root”. Not to be alarmist, but if you fail to UNcheck this, you can write your new content over your existing content! So UN-CHECK! You have your 10 days of backups with FastComet, so once you’re done installing your new site, you can verify that everything is still fine with your existing site(s).
- Accept the location it offers for Document Root
- Accept the subdomain it offers
- Click Submit.
- Go back to Tools.
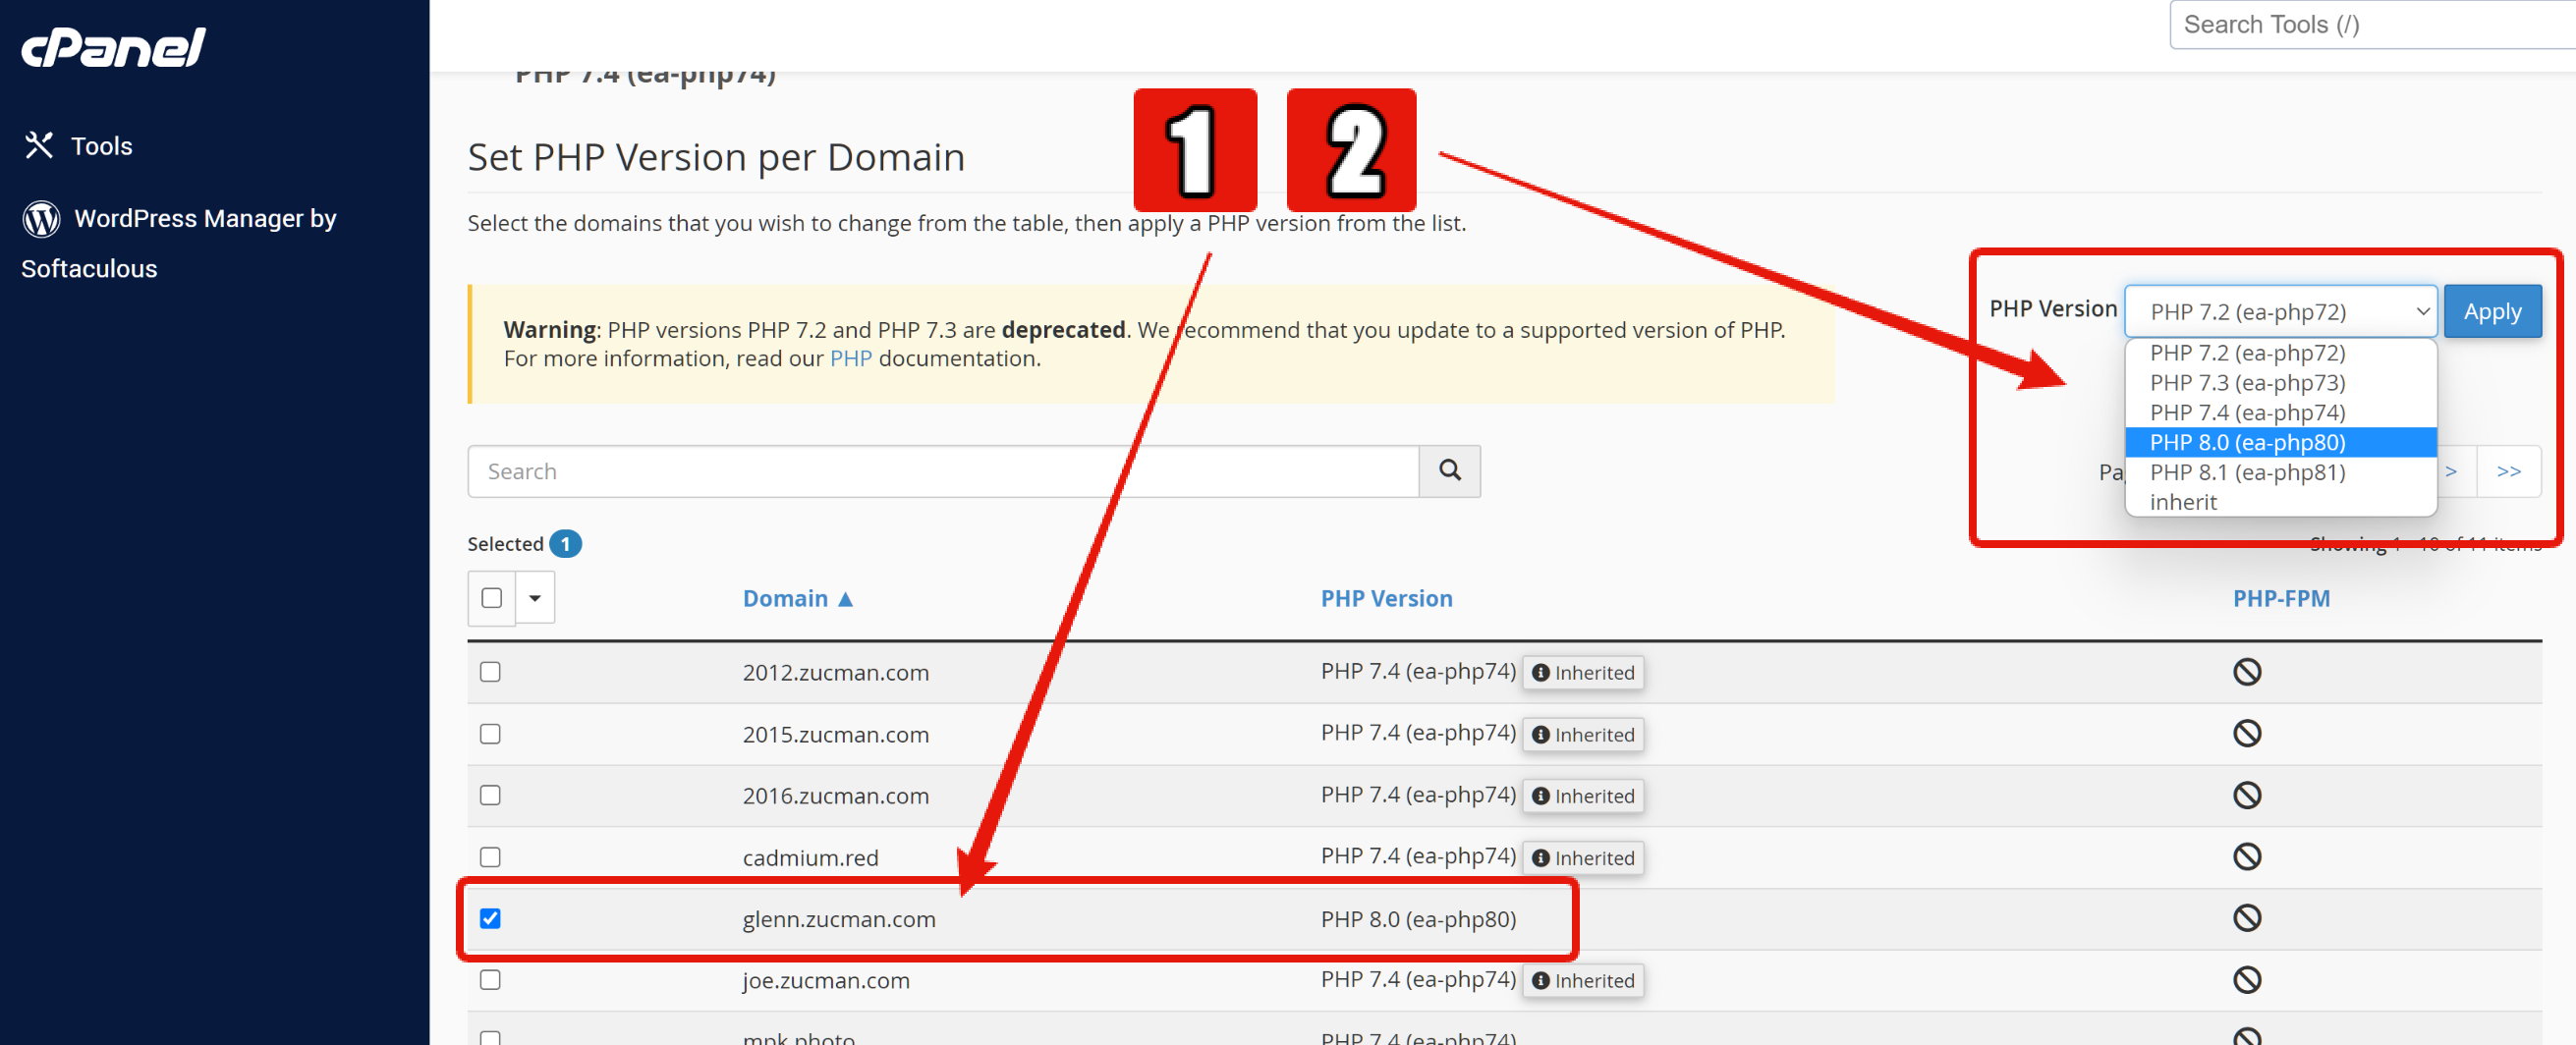
Software
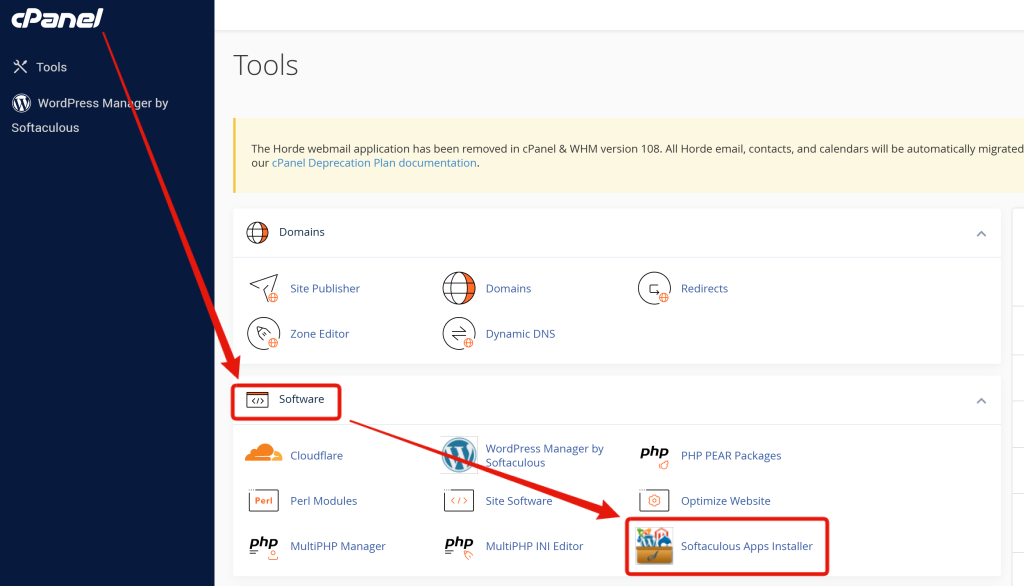
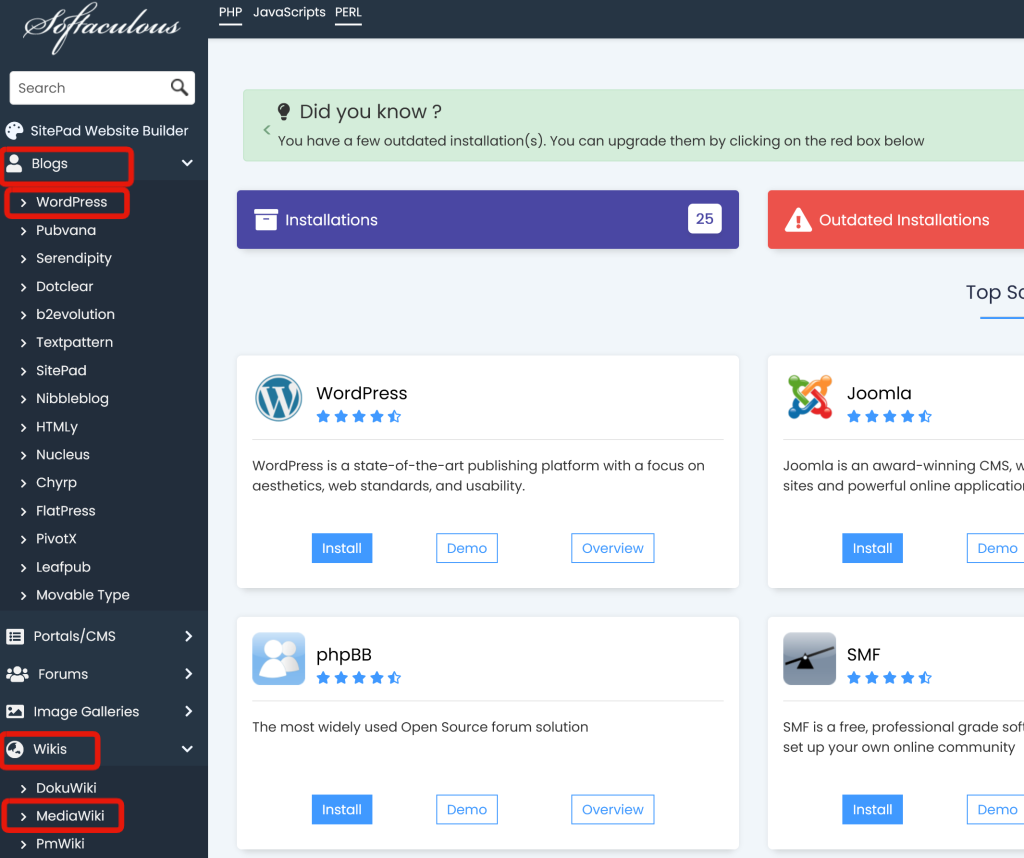
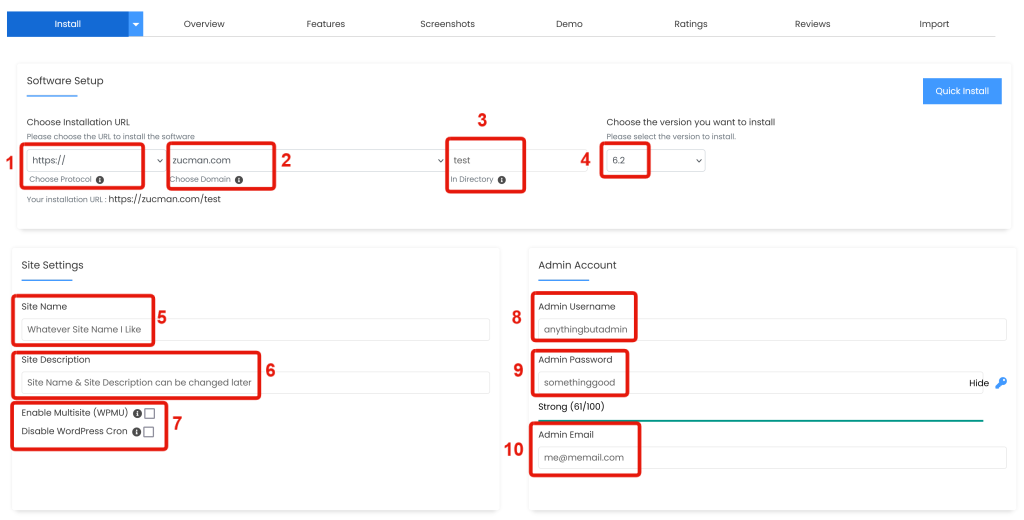
- Use the Drop-down to choose the “https://” protocol
- Use the Drop-down to choose one of your Domain Names
- Type the name of the “directory” you want to install the software at, like “test”, “descartes-ideas”, or whatever you like. If you leave this box blank, then you’ll install the software at the domain you selected in 2 above
- Accept the latest version of your software. At the time of this writing, that’s v6.2 for WordPress
- Give you site a name – can change later
- Give your site a description – can change later
- Leave these UNchecked
- The default admin username is “admin” — CHANGE THIS! If you accept the “admin” default it’s a free back door for hacker-bots to brute force their way into your site an wreak havoc!
- Use a strong password
- Add your email
Now scroll down for yet more options
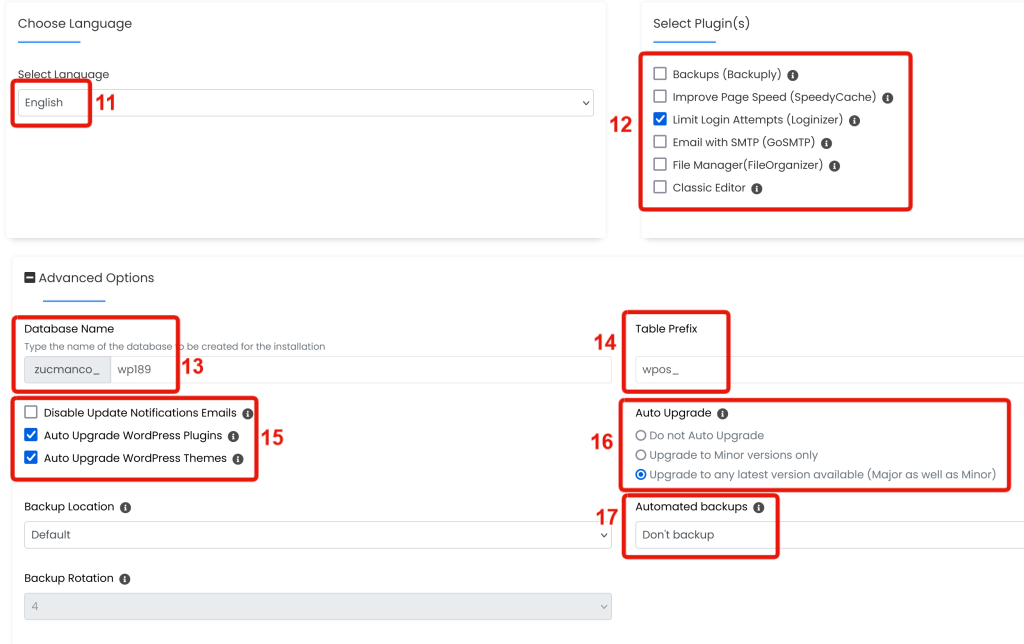
11. Language English
12. I would skip all of these plugins except Install Logonizer. It will be helpful with the legions of hackerbots that will constantly be at your door once your URL becomes known
13. & 14. — accept the default Database Name & Table Prefix
15. Check Auto Upgrade Plugins & Themes
16. Check Upgrade to any latest version available (Major as well as Minor)
17. I would select “Don’t Backup”. You’re already paying FastComet for your 10 days of VPS Offsite Cloud Backup.
Now scroll down for more yet more options!

18. I would skip “select theme”. These are just a few WP themes that Softaculous is paid to feature. When you get to your WP install you can choose from over 10,000 open source themes from the WordPress Theme Repository. BTW, it’s a bad idea to buy themes from external providers. These have a higher probability of having vulnerabilities. Themes from the repository come with a bit more assurance. The WP repository only accepts free & open themes. Many theme providers create a “lite” version to offer for free in the repository and then a “pro” version they will sell you. The lite version might have everything you want. If you like a theme and do want extra features, it’s fine to buy the pro version. But do start with the WP repository.
19. Enter your email address
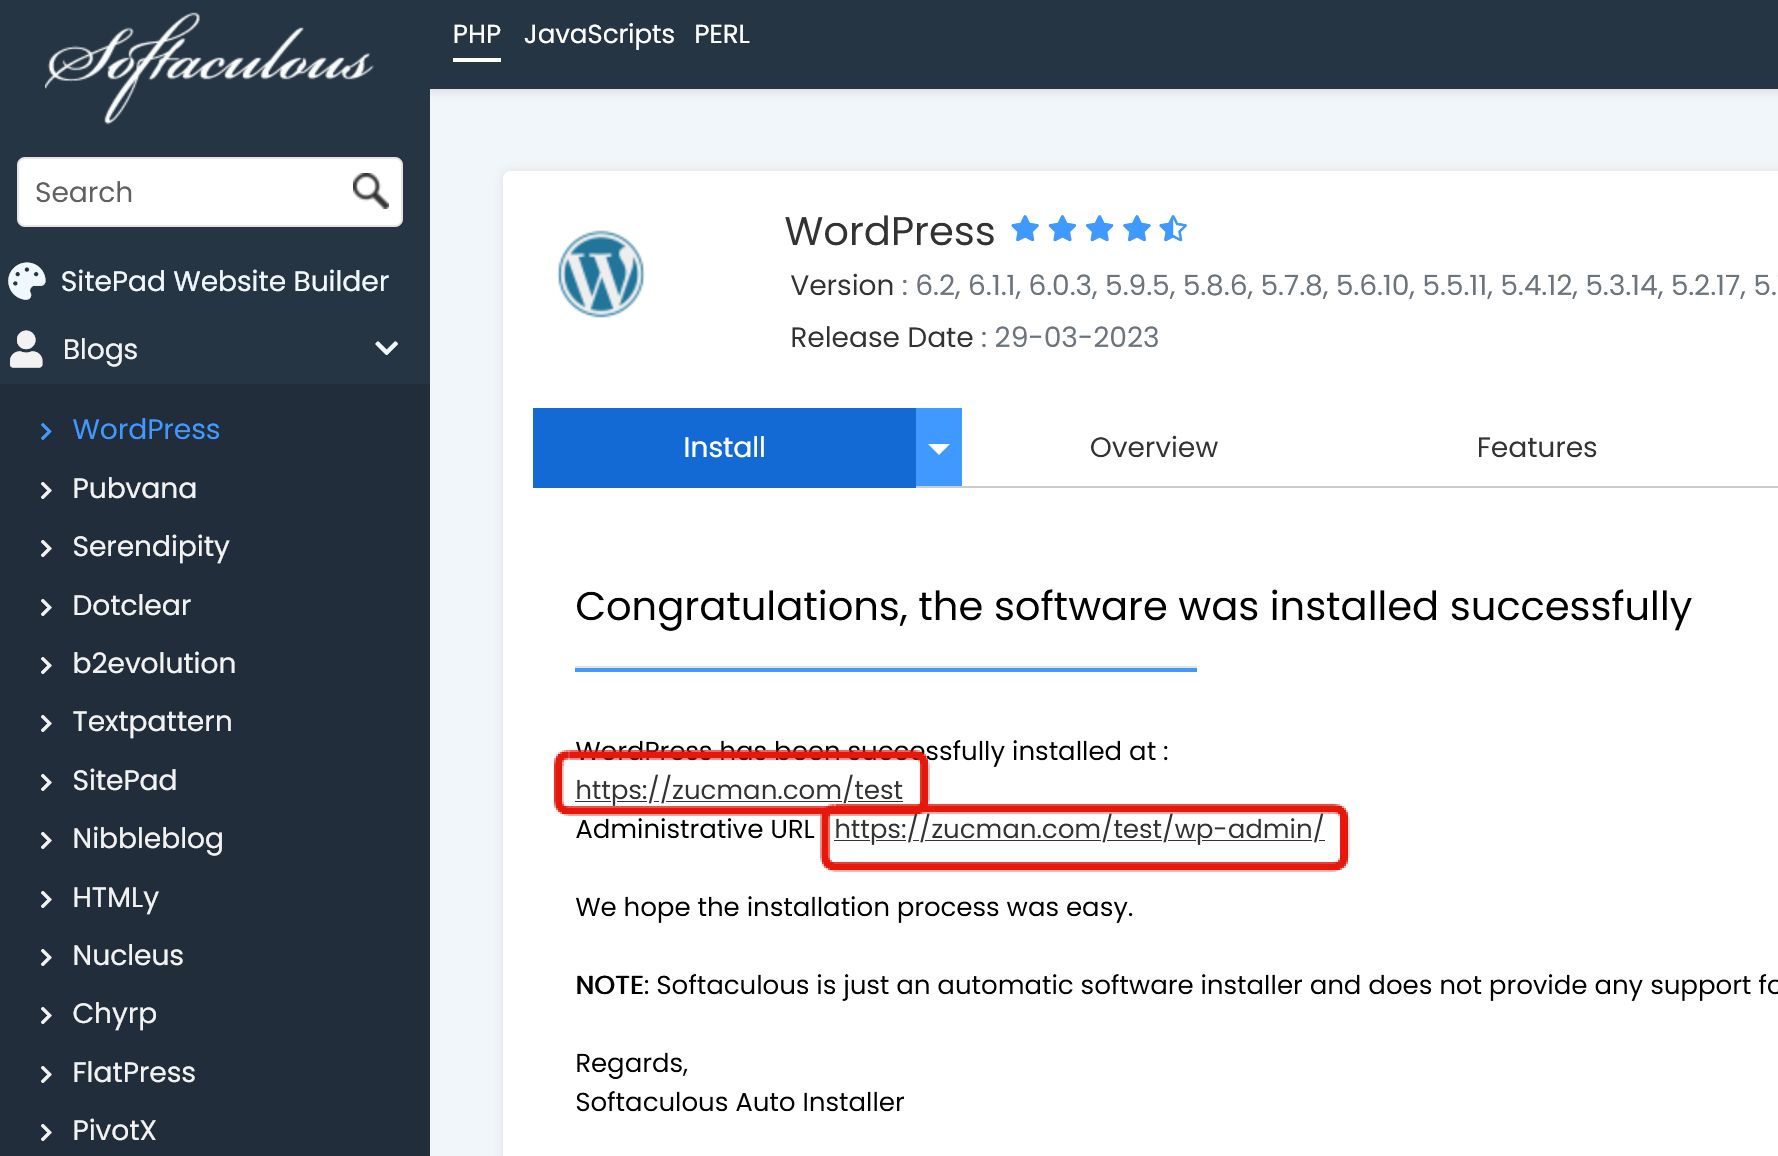
20. at last, click Install!
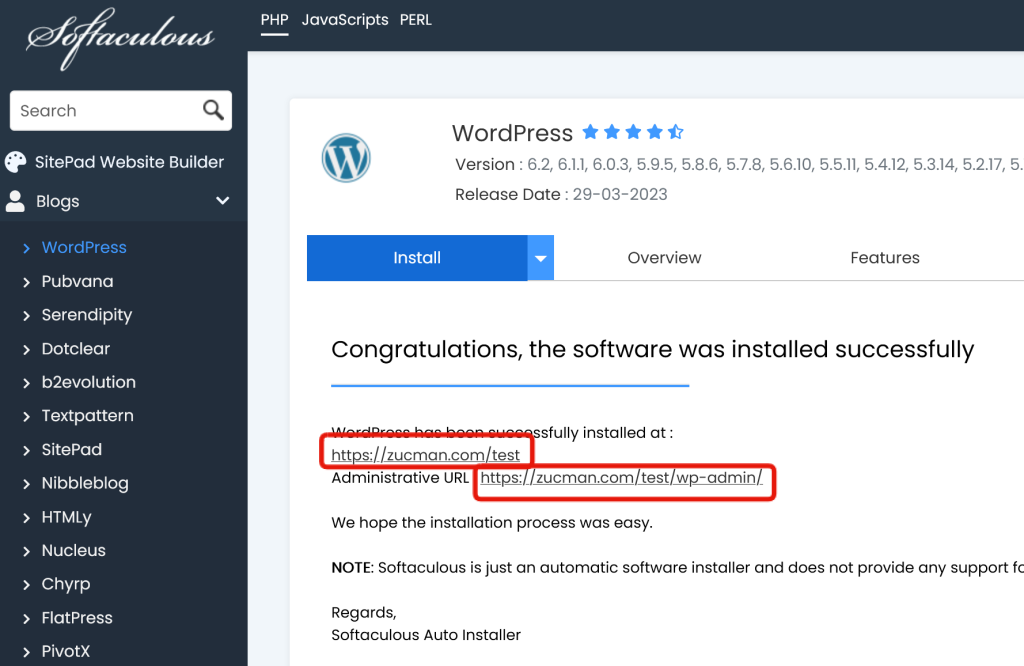
Good luck!
LMK if you have questions or problems!